
You probably have curly hair; therefore, you are well aware that curly hair has its own personality. One day, it jumps with excitement. The next, it refuses to cooperate. The truth? Curly hair lives on moisture, balance, and plenty of patience.
But here’s a secret many curlies overlook: the products you use when washing your hair can either nurture or sabotage your curls. One of the greatest offenders behind dull, limp, or dry curls? Silicones.
The Case Against Silicones for Curls
Let’s be clear—silicones are commonly found in shampoos, conditioners, and styling products. They give that smooth, shiny, frizz-free finish… at least on the surface.
But there’s a catch.
Silicones are not water-soluble. That means they build up on your strands, forming a plastic-like coating. This is bad news for curls, which thrive on moisture and breathability. When silicone buildup blocks hydration, your strands become drier and thirstier—no matter how much deep conditioner you apply.
Switching to a silicone-free hair wash routine can be a true game changer. It allows your curls to breathe, soak in moisture, and bounce back to their natural, lively shape.
Know Your Curl Type—Because One Routine Doesn’t Fit All
Before diving into products and steps, it’s important to understand your curl type. Are you working with smooth waves, springy spirals, or tight coils? Your curl type affects how often you wash, how much moisture you need, and what ingredients will benefit you most.
Here’s a quick breakdown:
-
Type 2 (Wavy): Loose curls that tend to get oily faster. These strands don’t need heavy moisture.
-
Type 3 (Curly): Springy, defined curls that often frizz and crave hydration and structure.
-
Type 4 (Coily/Kinky): Tightest curl pattern, most fragile and prone to dryness. These curls love oils, thick creams, and regular deep conditioning.
Knowing your type will help you customize your entire routine—from wash day to styling—and support your natural curl pattern instead of fighting it.
Put a Clean Slate First: The Pre-Silicone Detox
If you’ve been using silicone-based products, there’s a good chance your curls are suffocating under layers of product buildup. To truly experience the benefits of your new silicone-free regimen, start with a one-time clarifying wash.
Use a clarifying shampoo that’s sulfate-free (yes, they exist) to break through the residue and give your curls a clean slate.
Prepare for a detox window: Your hair may feel strange for a week or two—less sleek, maybe gritty. That’s normal. What you’re seeing is your actual hair, raw and real, without artificial smoothers. It’s the start of something better.
Step 1: Pre-Wash Preparation (It’s More Important Than You Think)
Prep your curls before entering the shower. Spend a few intentional minutes here—this step saves you from pain, knots, and breakage.
✅ Untangle With Care (Untwist At Your Own Risk)
Never wash tangled, dry, or stretched curls.
Don’t go in wet without detangling first. Use a wide-tooth comb or your fingers, starting at the ends and working upward. If your hair feels too dry, apply a light oil like coconut, olive, or jojoba to ease the detangling process.
⭐ Pre-Poo (Optional—But Gold)
A pre-poo means applying oil or a hair mask to dry hair before shampooing. It acts as a barrier, reducing how much moisture the shampoo strips away. Great DIY options include:
-
A banana + honey mask
-
Avocado oil
-
Argan oil
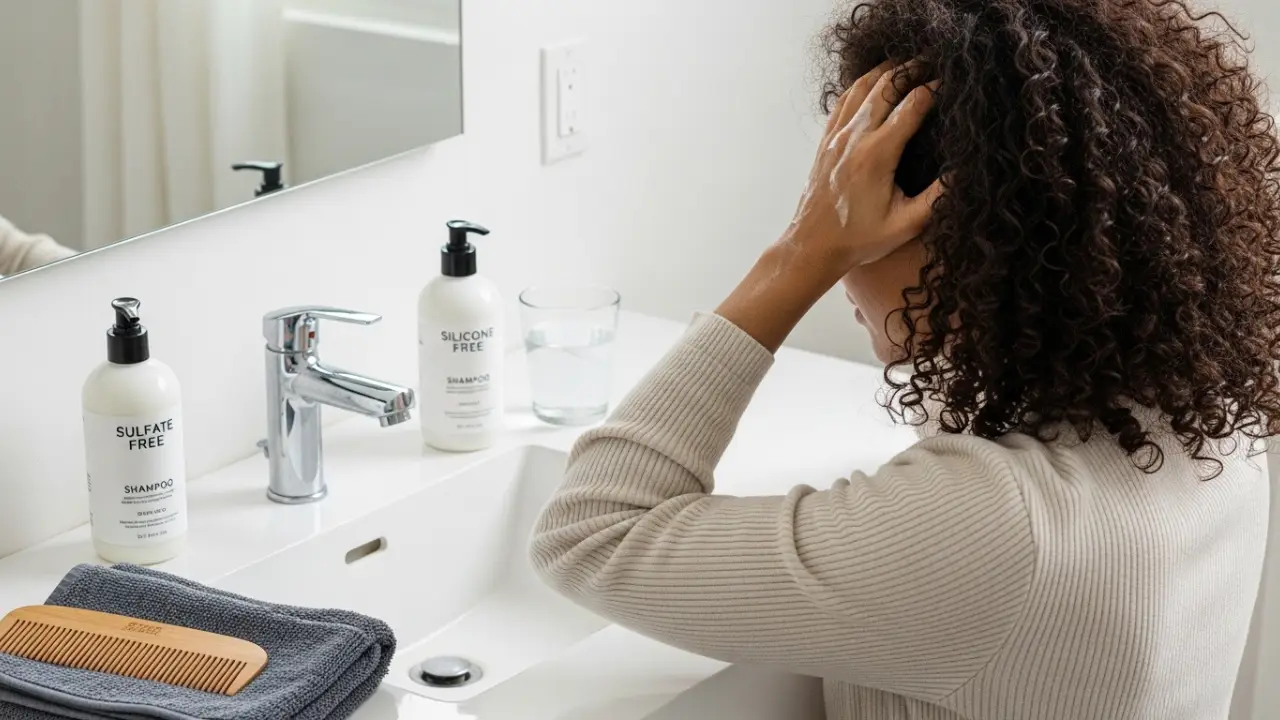
Step 2: The Right Shampoo—Silicone-Free That Cleans
It’s tempting to chase thick lather and a squeaky-clean feel. But here’s the truth: curls don’t want squeaky—they want moisture and balance.
Choose a sulfate- and silicone-free shampoo that gently cleans the scalp while preserving hydration. You don’t need foam. You need results.
Washing Curly Hair: Step-by-Step
-
Focus on the scalp. That’s where buildup hides. Use your fingertips, not nails, to massage gently.
-
Don’t rub or scrub the ends. Let the shampoo rinse through your strands naturally.
-
Use warm—not hot—water. Hot water dries curls.
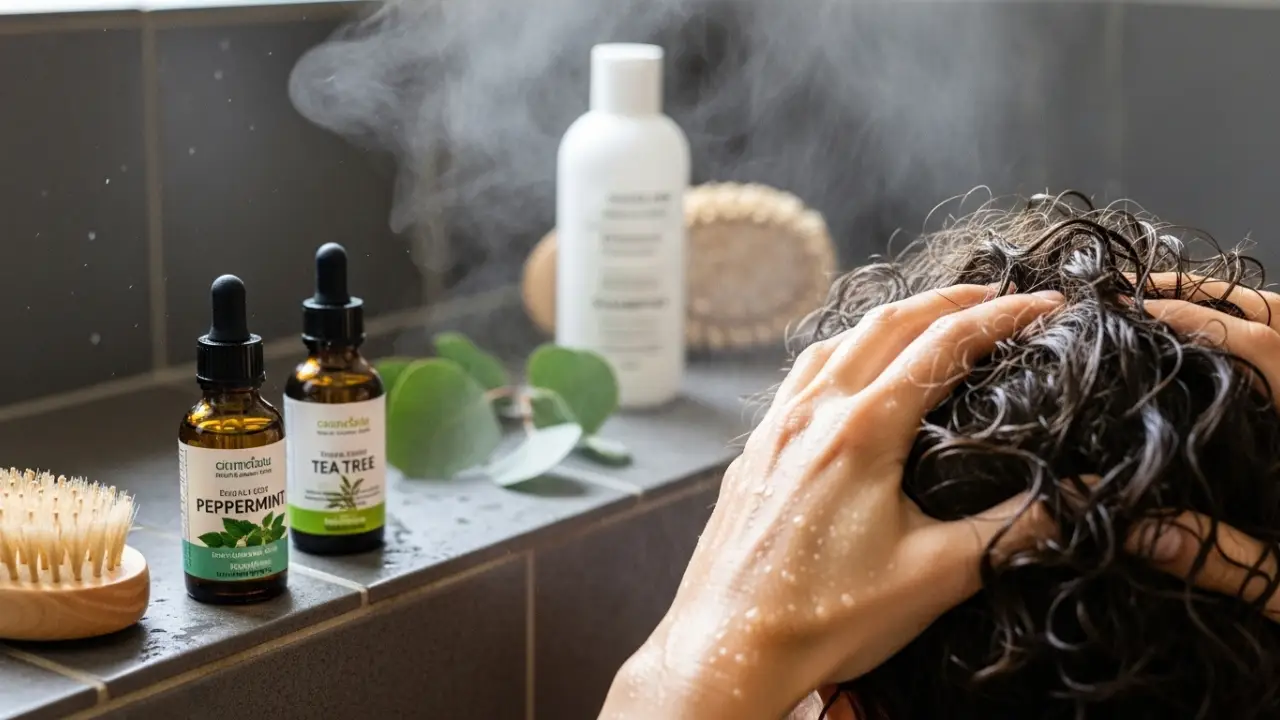
🌿 Recommended Shampoo Ingredients for Curls:
-
Aloe vera – calming, hydrating
-
Tea tree oil – great for itchy scalps
-
Peppermint or rosemary – stimulate the scalp
-
Coconut-based cleansers – gentle but effective
🚫 Ingredients to Avoid:
-
Sulfates (e.g. sodium lauryl sulfate) – strip moisture
-
Silicones (anything ending in -cone or -xane) – cause buildup
-
Harsh alcohols – overly drying
Step 3: Moisturizing Conditioner – Sans Silicones
Once your scalp is clean, your hair is ready to be fed. This is where the real hydration begins—moisturizing, detangling, and smoothing the cuticle.
-
Apply a generous amount of silicone-free conditioner from the mid-lengths to the ends.
-
Use a wide-tooth comb or your fingers to detangle gently.
-
Let it sit for 5 to 10 minutes, especially if your curls are feeling dry or stressed.
If your conditioner isn’t thick enough, boost hydration with a weekly hair mask. Look for ingredients that retain moisture, not just coat your strands.
Ideal Natural Ingredients for Conditioning:
-
Shea butter – rich and sealing
-
Marshmallow root extract – adds slip
-
Honey – natural humectant
-
Slippery elm – helps detangle
-
Glycerin – works best in humid climates
Step 4: Deep Conditioning = Real Curl Therapy
Let’s be honest—deep conditioning is not optional. It’s essential, especially for Type 3 and Type 4 curls, which are more prone to breakage.
-
If your hair is brittle but lacks protein, use a protein-free deep conditioner once a week.
-
If your hair is strong but needs moisture, go every two weeks.
DIY Deep Conditioning Recipes:
-
Honey + Yogurt – strengthens and softens
-
Avocado + Coconut Milk – deeply hydrating
-
Aloe Vera + Olive Oil – soothing and moisture-locking
Wrap your hair in a warm towel or use a heat cap to help open the cuticle and allow nutrients to penetrate deeply into each strand.
Step 5: Let It Ride on a Brrr Rinse
You’ve nourished your curls—now seal it in. Finish with a final rinse of cool water to:
-
Close the cuticle
-
Lock in moisture
-
Reduce frizz
-
Boost shine
It’s a small detail that makes a big difference in how your curls look and feel hours later.
Step 6: Non-Destructive Drying
Most curly-haired individuals unknowingly wreck their curl pattern during the drying phase. Terrycloth towels are the biggest culprits, roughing up the cuticle and causing frizz.
Expert-Approved Drying Tips:
-
Use a microfiber towel or a 100% cotton T-shirt
-
Gently squeeze or plop curls upward to remove excess water
-
Never rub your hair with a towel
-
If using heat, diffuse on a low temperature with a cup diffuser
💡 Pro tip: If you’re in a rush, air dry halfway, then diffuse to finish. It’s a method that preserves your curl pattern while giving you time flexibility.
Leave-In Conditioners: The Lightweight Savior in Hydration
Learning how to layer products properly is one of the most impactful shifts when transitioning to a silicone-free curly hair routine. A key part of that shift? Leave-in conditioners.
Leave-ins moisturize, loosen, and prep curls for styling—without weighing them down. Look for products with lightweight, nourishing ingredients such as:
-
Aloe vera
-
Flaxseed extract
-
Light oils like argan or grapeseed
How to apply: Use your leave-in on slightly damp hair—not dripping wet. If you’ve plopped your curls in a microfiber towel or cotton T-shirt, apply your leave-in once the hair has lost some excess water. Scrunch gently to encourage curl formation.
Non-Silicone Styling: What Works and What Doesn’t
Once you eliminate silicones, your curls are free to absorb real moisture—but that also means your styling products need to support your curl structure naturally.
What works:
-
Water-based curl creams and gels with humectants like glycerin or panthenol
-
Natural gel alternatives, such as flaxseed or chia seed gel
-
Medium-to-strong definition cream stylers with shea butter and jojoba oil
-
Lightweight foam mousses for finer curls seeking volume without heaviness
What to avoid:
-
Gels or mousses with drying alcohols
-
Products with silicones or artificial sealants
-
Anything that creates excessive crunch or stiffness
Application tips: Always emulsify the product in your hands before applying it to your hair. Use the “praying hands” or “rake and shake” methods to distribute product evenly. These techniques enhance definition while preventing harsh or brittle textures.
Drying Methods That Preserve Your Curls
How you dry your curls can make or break your entire routine. Here are the top techniques for drying curly hair without disrupting its structure:
1. Air Drying
This is the most gentle option. It avoids heat damage and allows your curls to dry into their natural shape. The downside is that it can be time-consuming. For best results, avoid touching your hair during the drying process, as this is the most common cause of frizz.
2. Plopping
Plopping involves wrapping wet curls in a cotton T-shirt or microfiber towel to soak up moisture and shape the curls. It helps speed up drying, prevents elongation from water weight, and enhances curl definition.
3. Diffusing
When you’re short on time, a diffuser attachment on a hair dryer can help. Use low heat and low airflow settings. Gently cup sections of curls into the diffuser and bring it toward your scalp, taking care not to blow the curls out of shape.
The Weekly Routine: Strengthening Curl Health in the Long-Term
Wash day is only part of the story. Healthy curly hair is built over time, with a routine that supports your hair’s natural rhythm and needs across the week.
Weekly Hair Calendar Template (Silicone-Free Edition):
Day 1: Wash Day (Care)
Cleanse, condition, deep condition, and style.
Day 3–4: Rehydration
Refresh curls with a fine mist of water plus a lightweight leave-in or aloe-based formula.
Day 5–6: Protective Styling
Use buns, braids, or a satin scarf to minimize manipulation and preserve definition.
Day 7: Scalp Care
Massage a few drops of rosemary or tea tree oil into your scalp to stimulate circulation, encourage growth, and unclog follicles.
Scalp care is often neglected, yet it’s the foundation of strong, healthy curls. Use gentle scalp scrubs or a soft brush weekly to remove buildup and boost blood flow.
How to Refresh Without Building Up
Gone are the days of layering products endlessly to revive curls. On a silicone-free routine, there’s no artificial buffer to hold all those layers together—so excess buildup happens fast.
Instead, try this approach:
-
Fill a fine mist spray bottle with distilled water and a few drops of leave-in conditioner or aloe juice.
-
Lightly spritz curls and scrunch with your hands.
-
Use a cool diffuser to re-activate the product already in your hair.
If frizz appears, smooth down the strands with a few drops of jojoba or argan oil. Avoid heavy oils like castor oil on dry curls—they’ll weigh them down.
The Detox Period Exists—But It’s Temporary
Let’s be honest: when you first go silicone-free, your curls might not look their best. They may feel off—frizzier, less defined, even uneven in texture.
But this isn’t failure. This is the beginning of restoration.
Silicones act like plastic wrap over your strands. Once you remove that, what you’re seeing is your actual hair—with its porosity, damage, dryness, and all. It’s real, and it’s step one toward healing.
Give it time.
Within a month, you’ll notice:
-
Improved product absorbency
-
Reduced tangles
-
Increased elasticity and bounce
Scalp Health: The Underestimated Key to Defined Curls
Silicones not only coat the strands but also accumulate on the scalp, leading to clogged pores and irritation. A silicone-free regimen gives your scalp the space to breathe.
Scalp Health Tips:
-
Use peppermint or tea tree oils once a week to refresh and stimulate
-
Massage your scalp during shampooing for 2–3 minutes to increase circulation
-
Avoid excessive shampooing—curls need their natural oils
A clean, balanced scalp is the soil from which healthy curls grow. Skipping this step is like planting a garden without tending to the earth.
Hair Porosity: More Important Than Ever in a Silicone-Free Routine
Silicone-free routines become truly effective when you understand one key element: your hair’s porosity. Porosity refers to how well your hair attracts and retains moisture—and it’s different for everyone.
How to Test Hair Porosity at Home:
Drop a clean, dry strand of hair into a glass of water.
-
If it floats: You have low porosity hair
-
If it sinks quickly: You have high porosity hair
What Your Porosity Means for Your Routine:
Low Porosity Hair:
-
Needs lightweight products
-
Responds well to steam and heat when conditioning
-
Benefits from humectants like honey and glycerin to help open the cuticle
High Porosity Hair:
-
Loves rich, creamy conditioners and oils
-
Requires moisture sealing after the shower to prevent loss
-
Thrives on layering with butters and heavier products
Understanding porosity is essential when selecting products for a silicone-free routine. The same product can give two people opposite results—just based on this one factor.
Can Silicone-Free Products Cause Build-Up?
Yes. Even without silicones, build-up can still occur, especially from:
-
Oils
-
Butters
-
Proteins
That’s why clarifying is still necessary, just without harsh sulfates.
Use a gentle clarifying shampoo every 3–4 weeks. Look for ingredients like:
-
Apple cider vinegar
-
Tea tree oil
-
Activated charcoal
When to clarify:
-
Your curls stop responding to styling products
-
Hair feels greasy, heavy, or waxy after a wash
Stop Guessing: What to Look for in a Silicone-Free Routine
Here’s a quick, targeted list of ingredients to guide your silicone-free curl care:
Hydrators:
-
Aloe vera
-
Glycerin
-
Honey
-
Panthenol
Conditioners:
-
Shea butter
-
Avocado oil
-
Coconut cream
Sealers:
-
Argan oil
-
Rosehip oil
-
Jojoba oil
Proteins (to repair damage):
-
Hydrolyzed silk
-
Quinoa protein
-
Keratin (in small, manageable amounts)
Avoid these silicone-related ingredients:
-
Dimethicone
-
Amodimethicone
-
Cyclopentasiloxane
-
Siloxane
-
Methicone variants
Always check product labels—even “natural” brands may include silicone-based ingredients in disguise.
Summary: The Journey Is Worth It
When I abandoned silicone-based routines, I finally began to see my curls for what they are: textured, beautiful, and worthy of real care—not cover-up.
It took time, patience, and some trial and error. But now, my hair feels lighter, healthier, and more alive than ever before.
I’ve also learned to listen to my hair—to understand what it needs instead of masking the problem. If you’re starting this journey too, trust the process. Your curls will reward you with bounce, definition, and an authentic shine that’s fully yours.